
When I first dipped my toes into the world of website creation, I was enthusiastic but admittedly naive. One of the earliest challenges I encountered was the issue of image file sizes. Picture this: I innocently dragged an image straight from my phone and dropped it into the media library of my WordPress website, thinking it would instantly boost website speed with comprehensive image optimization. Little did I know the intricacies behind it all!
A subsequent Google Sitekit performance check quickly doused my enthusiasm with a cold splash of reality – the score was far from impressive. As I tried to decipher the multitude of suggestions thrown at me, one term seemed to pop up repeatedly: image size, and the need to boost website speed with comprehensive image optimization.
Contents
- 0.1 So, Let’s ask Chat GPT how to boost website speed with comprehensive image optimization.
- 0.2 Reducing Image File Size: A Guide to Optimizing Website Images
- 1 Simple Right?
- 1.1 Here is how I do it
- 1.2 Boosting Website Speed with Image Size Choices in Elementor Page Builder:
- 1.3 Boosting Website Speed Through Photopea: A Fun Journey in Image Optimization
- 1.3.1 Stepping into the Vibrant World of Photopea
- 1.3.2 Uploading Your Visual Delight
- 1.3.3 A Quick Preview of Our Canvas
- 1.3.4 Optimizing with Precision: Photopea’s ‘Export As – Jpg’ Feature
- 1.3.5 Harnessing the Magic of Adjustments
- 1.3.6 Crafting with the Smudge Tool
- 1.3.7 Witnessing the Transformation
- 1.3.8 The Grand Finale
- 1.3.9 Summary:
- 1.4 Maximizing Image Efficiency with CompressImage.io: A Guide to Boosting Website Speed
- 1.5 Level Up Your Website Experience: Embracing CDNs and Lazy Loading to Boost Website Speed with Comprehensive Image Optimization
- 1.5.1 The Magic of CDNs
- 1.5.2 The Genius of Lazy Loading
- 1.5.3 Finding the Perfect Solution with Chat GPT
- 1.5.4 Why Cloudflare Stands Out
- 1.5.5 Venturing into Cloudflare for Your Site? Journey with Me & Chat GPT!
- 1.5.5.1 Step 1: Starting with Cloudflare
- 1.5.5.2 Step 2: Introduce Your Website to Cloudflare
- 1.5.5.3 Step 3: Choosing Your Cloudflare Plans
- 1.5.5.4 Step 4: A Quick DNS Check
- 1.5.5.5 Step 5: Linking Up With Cloudflare
- 1.5.5.6 Step 6: A Moment of Cloudflare Magic
- 1.5.5.7 Step 7: Tailoring Cloudflare For You
- 1.5.6 Golden Rule: Before you embark on digital adventures, back up your website. It’s your safety net in the wild world of the web.
- 1.5.7 Cloudflare Gem from Chat GPT
- 1.5.8 Embracing Cloudflare’s lazy loading? A couple of steps:
- 1.6 Conclusion:
So, Let’s ask Chat GPT how to boost website speed with comprehensive image optimization.
Absolutely, this is a frequent concern for many website owners and bloggers. To truly boost website speed with comprehensive image optimization, one must understand the nuances of image management on websites. Dive with us into this comprehensive guide on “Reducing Image File Size” and see the transformative impact of well-optimized images on website performance.
Reducing Image File Size: A Guide to Optimizing Website Images
Introduction:
In today’s fast-paced digital world, user experience is paramount. One of the key factors that influence a website’s speed and user experience is the size of its images. Heavy, unoptimized images can slow down a site, but you can boost website speed with comprehensive image optimization. This guide, inspired by the guidance from Chat GPT, will walk you through the importance of image optimization and provide actionable steps to effectively reduce image file sizes without compromising on quality.
1. Why Image Optimization Matters:
Improved Website Speed: Websites that boost website speed with comprehensive image optimization offer better user experiences. Google also considers page speed as a ranking factor.
Enhanced SEO: Faster websites that prioritize image optimization often rank higher in search engine results.
Mobile User Experience: In our mobile-centric world, optimized images ensure a smooth browsing experience on smaller screens.
2. Tools for Image Optimization:
Online Compressors: Use tools like TinyPNG and Compressor.io to boost website speed with comprehensive image optimization.
Software Solutions:
Photoshop or GIMP: These options offer “save for web” features, a go-to for many aiming to boost website speed with comprehensive image optimization.
Photopea: This free tool is perfect for those who want to boost website speed with comprehensive image optimization on a budget. It offers numerous optimization options across multiple formats.
3. Image Formats and Their Use Cases:
JPEG (or JPG): Best for photos. Using the right compression can boost website speed.
PNG: Ideal for images that require transparency, such as logos. Typically larger than JPEG.
WebP: A modern format that can significantly boost website speed with comprehensive image optimization.
4. The Balance Between Quality and Size:
It’s vital to boost website speed with comprehensive image optimization without sacrificing quality. Understand the trade-offs and ensure clarity isn’t compromised.
5. Additional Tips:
Resizing Images: Properly sized images can boost website speed.
Using CDNs: CDNs can boost website speed with comprehensive image optimization by delivering images faster globally.
Lazy Loading: A technique to ensure images load only when necessary, enhancing the website speed.
Conclusion:
Image optimization is crucial in today’s digital landscape. Stay updated with the latest tools and techniques. By following this guide and Chat GPT’s guidance, you can boost website speed with comprehensive image optimization and offer visitors a swift, seamless browsing experience.
Simple Right?
From the sunlit days of July, my mission was to boost website speed with comprehensive image optimization. Embracing tools like Photopea and compress.io, I mastered the craft of perfecting and downsizing images. The journey further evolved when I turbocharged my website’s delivery through Cloudflare’s CDNs. The cherry on top? Wisdom from ChatGPT. Guided by insights on how to boost website speed with comprehensive image optimization, I discovered that Cloudflare’s intrinsic lazy loading capability eliminated the need for an extra WordPress plugin. This revelation was pivotal, enabling me to refine my website’s images and significantly improve its performance.
Here is how I do it
Boosting Website Speed with Image Size Choices in Elementor Page Builder:
Navigating the intricacies of the Elementor Page Builder, one quickly discerns its prowess in effortlessly enhancing website performance. The platform’s astute image widget is a testament to this, offering an array of sizes tailored for diverse design aspirations. From concise thumbnails to expansive full-screen images, each option is a strategic decision, influencing not just aesthetics but also website loading speed. By mastering these choices, one can seamlessly boost website speed with comprehensive image optimization, ensuring a delightful user experience across devices and resolutions.
When crafting pages using the Elementor Page Builder, optimizing for website speed becomes a breeze, especially with its specialized image widget. This widget presents a range of size options to align with your design ambitions. Here’s an insight into these options:
Thumbnail (150×150): Boost website speed by selecting this ideal size for previews, summaries, or when showcasing multiple images in a grid. It’s compact, ensuring efficient bandwidth usage.
Medium (300×300): Going a notch higher from thumbnails, this dimension is splendid for featured images in blog listings, striking a balance to boost website speed without compromising clarity.
Medium-Large (768×0): Tailored primarily for tablets, it combines width precision with dynamic height. Perfect for portrait images in content sections or columns, it plays a role in speeding up webpage loading times.
Large (1024×1024): The sweet spot for most full-width content areas, especially on desktops. This choice guarantees visual appeal while being cautious of bandwidth, aiding in website speed optimization.
1536×1536: Crafted for high-resolution displays. It ensures images maintain sharpness on larger screens, without significantly impacting speed.
2048×2048: The preferred size for immersive full-screen images on extensive and high-resolution monitors. Ideal for hero shots or intricate photography, it contributes to a swift website experience without quality loss.
Full: Uses the image’s raw dimensions. Best when originality and intricate details are paramount. However, to boost website speed, it’s essential to be cautious of the inherent large file sizes.
Custom: Provides the flexibility to define bespoke sizes as per your design ethos, guaranteeing that images blend seamlessly into any distinctive space or layout, all while optimizing for speed.
Summary:
Navigating away from the Elementor page builder, where our image size was clearly identified, our journey led us to Photopea. Confronted with our original image bearing a file size of 127 KB, we recognized the potential for further compression without compromising the image’s quality.
Boosting Website Speed Through Photopea: A Fun Journey in Image Optimization
Stepping into the Vibrant World of Photopea
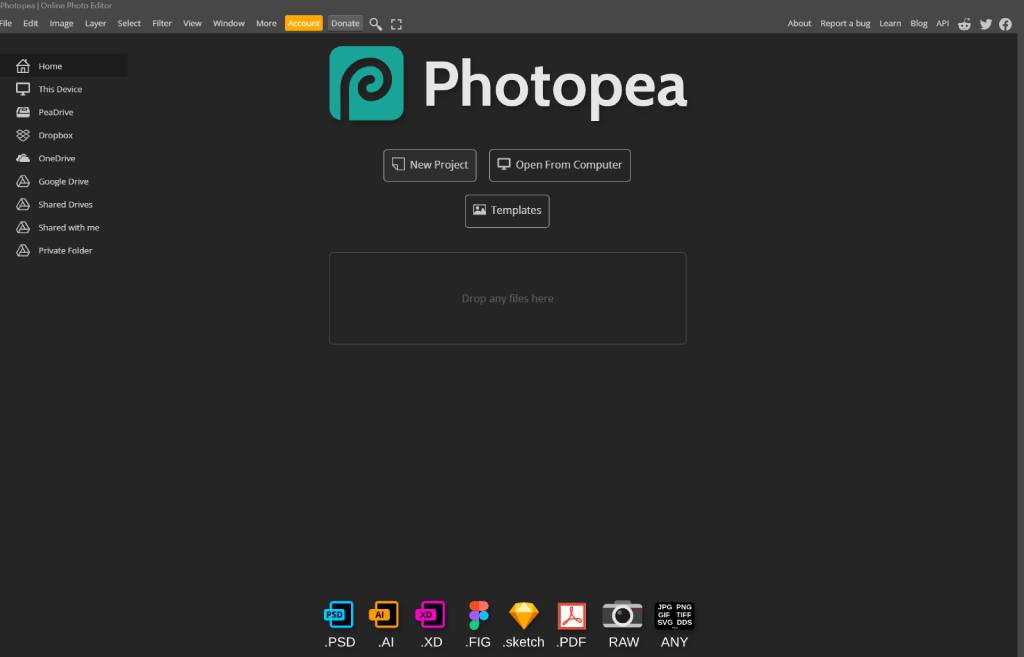
Kickstart your image optimization journey! Launch your browser, type in “Photopea”, and dive into the inviting realm of Photopea.com, where every pixel presents a chance to boost website speed with comprehensive image optimization!
Uploading Your Visual Delight
Drag and drop your image straight from your computer, right into the welcoming arms of Photopea’s ‘Open From Computer’ box.
A Quick Preview of Our Canvas
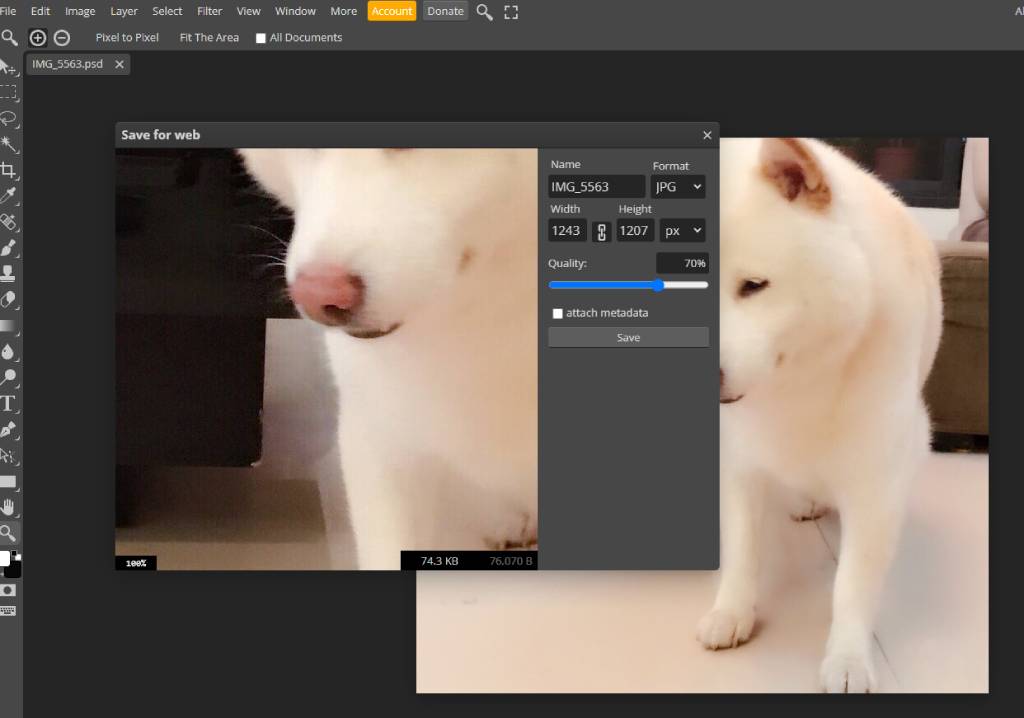
Optimizing with Precision: Photopea’s ‘Export As – Jpg’ Feature
Tapping into Photopea’s “Export As – Jpg” function, we found our solution. Presented with the customization option, we adjusted the image’s width to match the 1024-pixel recommendation from Elementor’s image editing box. This seemingly simple adjustment yielded impressive results: the file size dramatically dropped to a lean 74.3 KB.
Before embarking on our editing escapade, let’s acquaint ourselves with our image’s file size. Hover to ‘File’, then ‘Export As’, and there! The size, right at the bottom. Remember this number, as we’ll see it transform soon! (e.g., 74.3KB)
This process underscores the power of targeted image optimization. A few adjustments in dimensions can lead to significant file size reductions, paving the way for faster load times and a more efficient website experience.
Harnessing the Magic of Adjustments
Navigate to ‘Windows’ on the top toolbar and tap on ‘Adjustment’. With this potent tool now in your toolkit, you’re set to enhance colors, tweak lighting, and, in essence, boost website speed with image optimization!
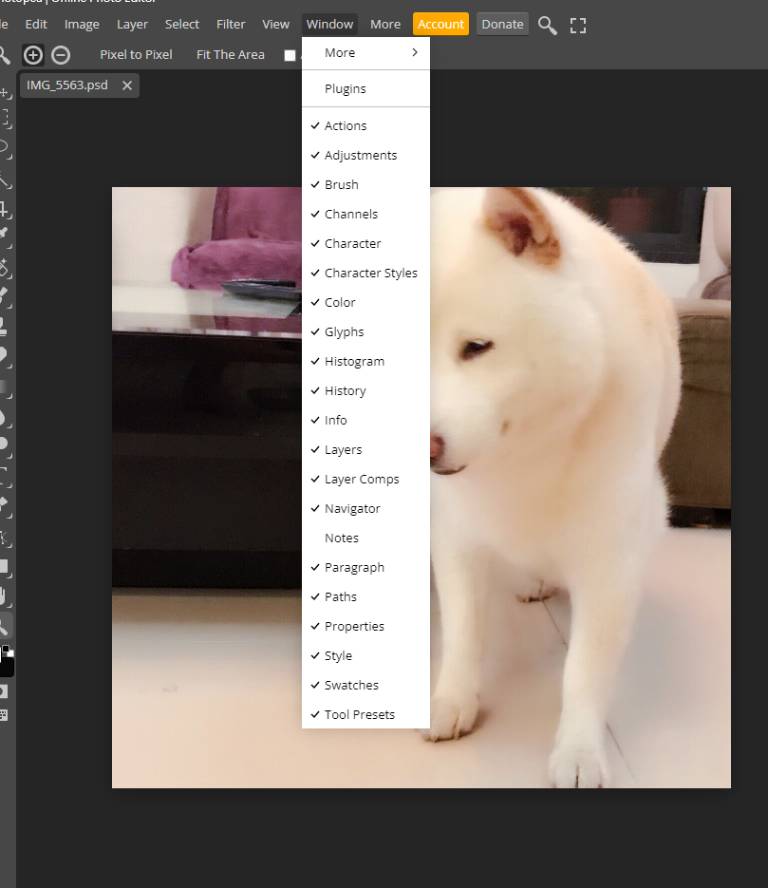
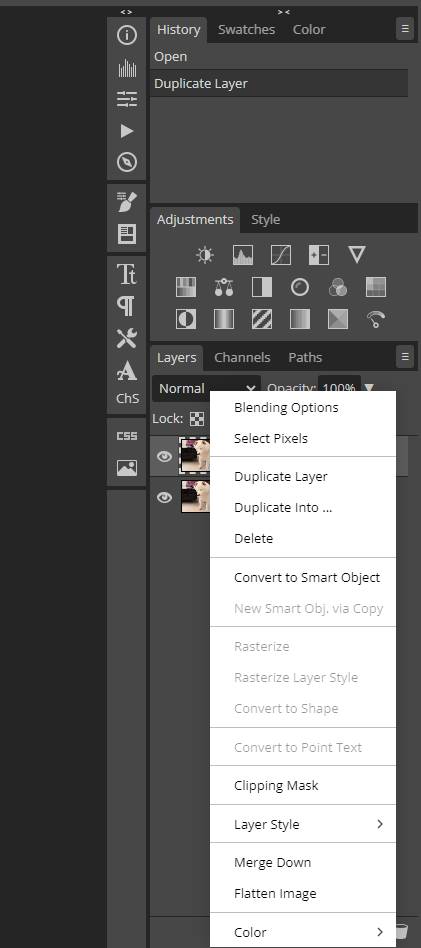
A pro tip for editing? Duplicate your layer! Right-click on the Layer Box and select ‘Duplicate Layer’. This gives us a sandbox to play in without affecting the original image.
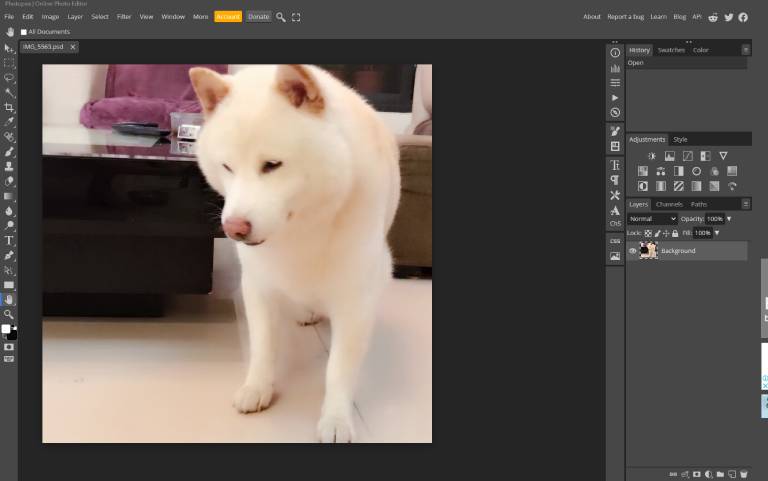
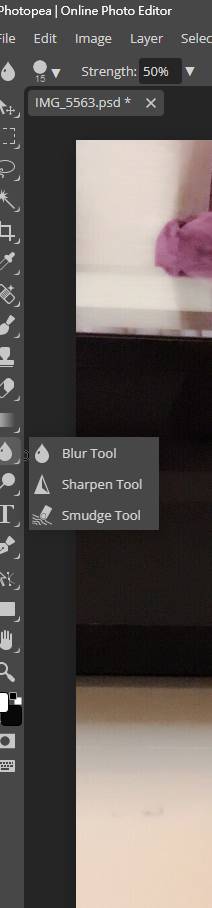
Crafting with the Smudge Tool
On the left toolbar, find the blur tool selection and pick the smudge tool.
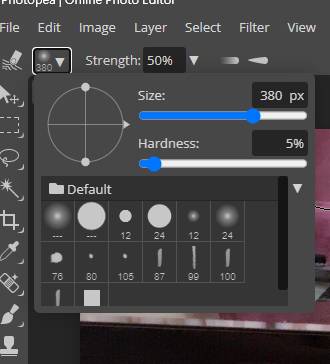
Witnessing the Transformation
Adjust the brush size and hardness from the top secondary toolbar. It’s time to unleash your creativity and smudge the background to your heart’s content!
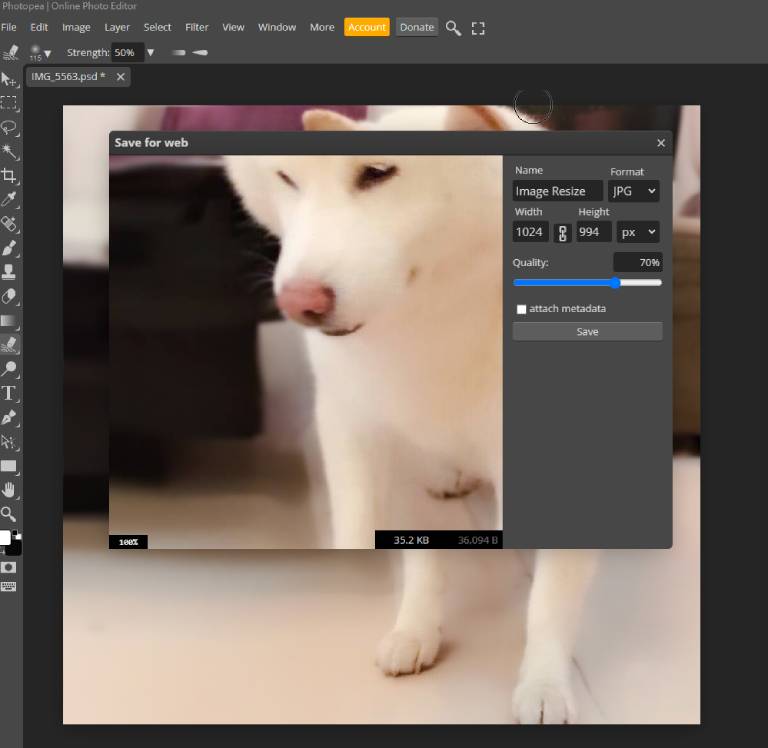
The Grand Finale
Done with the masterpiece? Click ‘File’ in the top toolbar and head to ‘Export as’. A window will pop up for you to name your file, and adjust the format, size, and quality. As you save in jpg format, you’ll notice that the once-chunky image is now a lightweight version, all ready to speed up your website! For instance, it’s trimmed down to a neat 35.2KB from 74.3KB!
Tap ‘Save’, download, and there you have it – an optimized, web-friendly image!
Summary:
Dive deep into Photopea and harness its potential to boost website speed with comprehensive image optimization. Embrace the journey, enthusiastically explore, and master the nuances of image refinement. Remember, every kilobyte saved translates to swift web performance. Here’s to ensure your site’s visitors enjoy a faster, seamless browsing experience! Cheers to the optimized web adventures ahead!
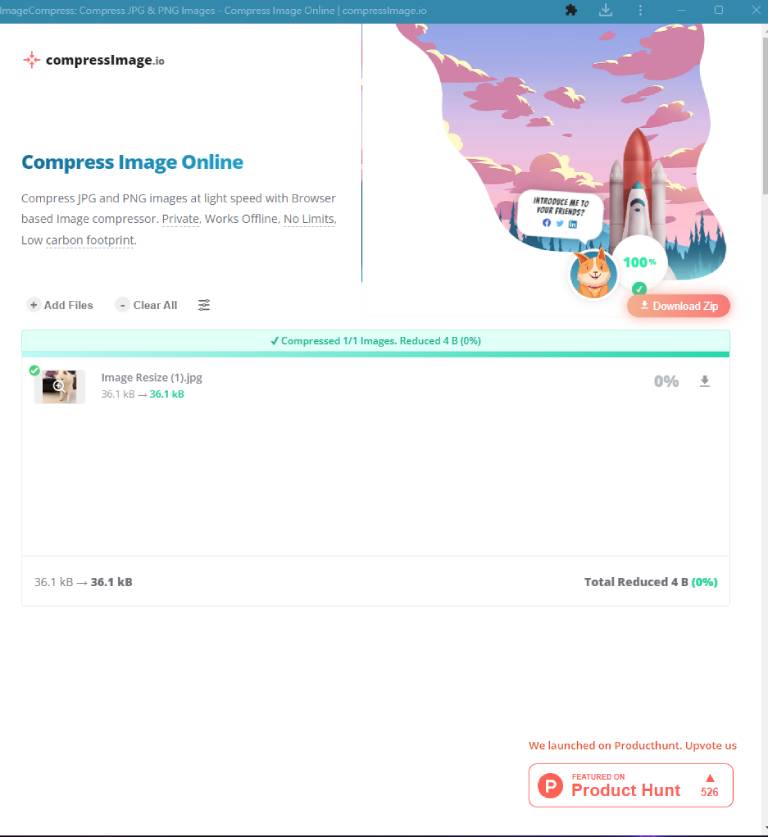
Maximizing Image Efficiency with CompressImage.io: A Guide to Boosting Website Speed
Step into the Digital Efficiency of CompressImage.io
When you’re looking to boost website speed with comprehensive image optimization, CompressImage.io emerges as a front-runner. This online tool isn’t just any tool; it’s a game-changer for website owners, bloggers, and digital enthusiasts. By significantly reducing image file sizes without sacrificing quality, it paves the way for rapid website load times and enhanced user experiences.
Getting Started with Simplicity
CompressImage.io’s intuitive interface makes it straightforward: drag, drop, and let the tool handle the rest. And if you thought it was just for single images, think again. Got a batch? Drop them in, and watch as Compress.io compresses multiple images in one swift move.

Reaping the Rewards
Once compression completes, CompressImage.io presents a zip file filled with your optimized images. A simple click initiates the download, bringing you closer to a more streamlined web presence.
The Unveiling
After unzipping the file, you’re greeted with your images – streamlined, yet retaining their vibrant allure. The difference in file size can be astonishing, but the quality? Unwaveringly high.
Celebrate Your Achievement
By leveraging CompressImage.io, you’ve not only made your website more efficient but also took a giant leap to boost website speed with comprehensive image optimization. So, here’s to harnessing the best of technology and ensuring that every pixel on your platform shines both brilliantly and efficiently!
Level Up Your Website Experience: Embracing CDNs and Lazy Loading to Boost Website Speed with Comprehensive Image Optimization
The Magic of CDNs
Imagine delivering your site’s images at lightning speed to users from all corners of the world. That’s the power of Content Delivery Networks (CDNs). By leveraging CDNs, you can truly boost website speed with comprehensive image optimization. They make your website universally friendly, ensuring your content is right next door to every visitor, no matter where they’re browsing from.
The Genius of Lazy Loading
Lazy loading is another technique to boost website speed with comprehensive image optimization. It’s like a delightful surprise for your visitors. Images unveil themselves gracefully only when they step into the user’s view, ensuring quicker page loads and keeping visitors engaged.
Finding the Perfect Solution with Chat GPT
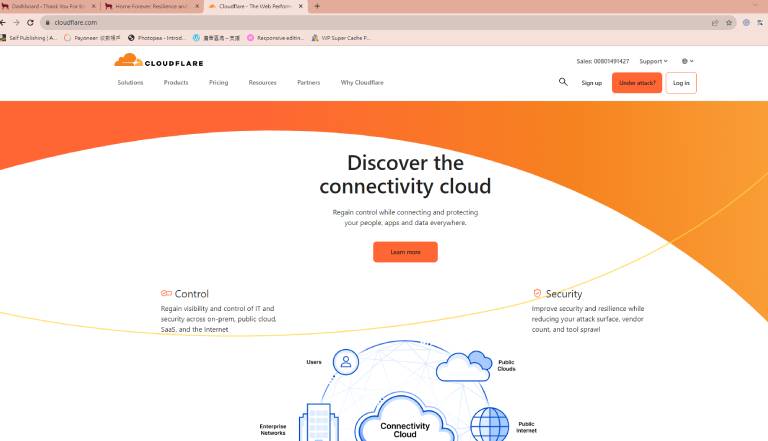
The journey to optimize was filled with discoveries, thanks to our trusty guide, Chat GPT. Out of the myriad of options, one star shone the brightest: Cloudflare. With its generous free plan, Cloudflare wasn’t just a solution; it was a revelation.
Why Cloudflare Stands Out
Global Reach: With CDN services, Cloudflare ensures your content takes a short hop, skip, and jump from anywhere in the world right to your visitor.
Sturdy Shield: Apart from speed, Cloudflare offers a protective embrace with features like DDoS protection.
Sleek Optimizations: Think minification, browser caching, and other behind-the-scenes magic to keep your website running smoothly.
Venturing into Cloudflare for Your Site? Journey with Me & Chat GPT!
Step 1: Starting with Cloudflare
Pop over to Cloudflare’s website.
Hit the “Sign Up” button.
Input your email, select a secure password, and voila, you have an account.
Step 2: Introduce Your Website to Cloudflare
Once in, Cloudflare will eagerly wait for your website’s domain. Type in your domain (like ‘mygreatsite.com’) – leave out the “www” or “http://”.
Give the “Add Site” button a nudge.
Step 3: Choosing Your Cloudflare Plans
Cloudflare will present its suite of plans. For starters, the “Free” plan is a great companion.
Click on “Continue” to forge ahead.
Step 4: A Quick DNS Check
With a quick scan, Cloudflare fetches your DNS records. It’s like it’s getting to know your website’s language.
Post-scan, ensure these DNS records match those from your hosting provider or domain guardian.
Ready? Click “Continue”.
Step 5: Linking Up With Cloudflare
Cloudflare hands over two nameservers.
Jump to your domain registrar’s digital abode (places like GoDaddy or Namecheap) and sign in.
Seek out the domain management or DNS settings section.
Swap out your existing nameservers for Cloudflare’s duo.
Seal the deal by saving changes.
Step 6: A Moment of Cloudflare Magic
Hop back to Cloudflare and give “Done” or “Continue” a click.
Patience is key now. Cloudflare does its rounds to see if your website recognizes it. Once the two are best buddies, you’re active on Cloudflare!
Step 7: Tailoring Cloudflare For You
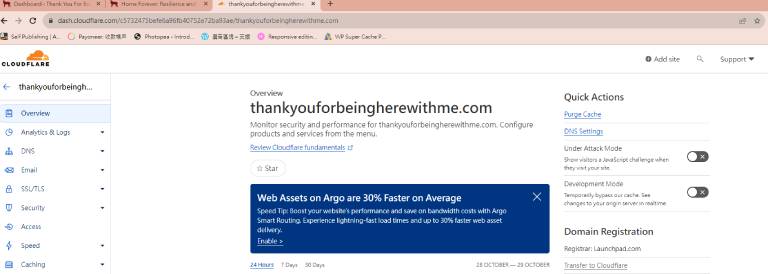
SSL: Got an SSL certificate? Set this to “Full”. If not, “Flexible” has got you covered.
Always Use HTTPS: Flick this switch on. Your site dons its security armor.
Auto Minify: Let Cloudflare trim the fat off JavaScript, CSS, and HTML. Your site becomes a quicker sprinter.
Brotli: Another compression wizard. Turn it on, and watch your website content become leaner.
Remember, Cloudflare isn’t just about speed; it’s your website’s shield. Dive deeper to uncover tools like firewalls, page rules, and more, sculpting both speed and safety for your site.
Even though Chat GPT’s knowledge stretches up to January 2022, and I was initially clueless about things like “nameservers,” the constantly evolving Cloudflare had a few tricks up its sleeve. But, with a sprinkle of intuition and a dash of determination, I tackled the setup effortlessly. Turns out, you can conquer tech mysteries when you dive right in!
Golden Rule: Before you embark on digital adventures, back up your website. It’s your safety net in the wild world of the web.
Cloudflare Gem from Chat GPT
Here’s a sprinkle of wisdom: If you’re tapping into Cloudflare’s innate lazy loading, sidestep those extra WordPress plugins. By doing this, you further boost website speed with comprehensive image optimization. Keeping things crisp ensures your site is both smooth and swift.
Embracing Cloudflare’s lazy loading? A couple of steps:
Switch it on in Cloudflare settings.
On WordPress, deactivate other lazy loading buddies.
It’s not just about speed; it’s about delivering a silky, seamless experience for every visitor. Cheers to a vibrant and swift digital journey!
Conclusion:
In today’s exploration, we’ve journeyed through the ups and downs of my web creation experience. From the technical mazes of how to boost website speed with comprehensive image optimization to the humorous misadventures with Yoast SEO, every step was a lesson learned. And isn’t that the essence of any venture? Mistakes made, lessons learned, and resilience strengthened. As we wrap up today, remember: every stumble is a stepping stone to mastery. Stay tuned for our next chapter where we dive deep into the wild waters of SEO and the rollercoaster ride with Google Console. Until then, happy creating, and always cherish the journey!
